Hi Yun Documents

Notification Target Guide

Introduction to Notification Targets

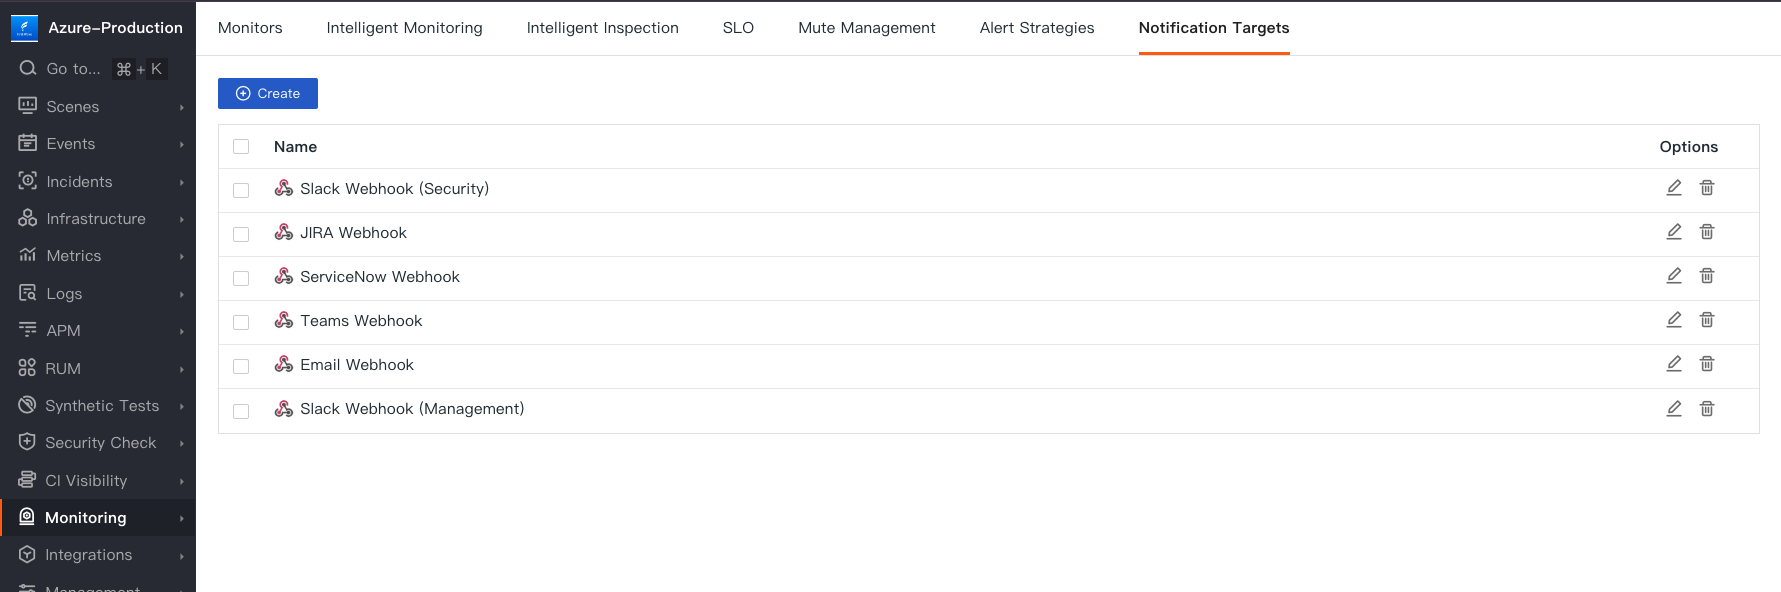
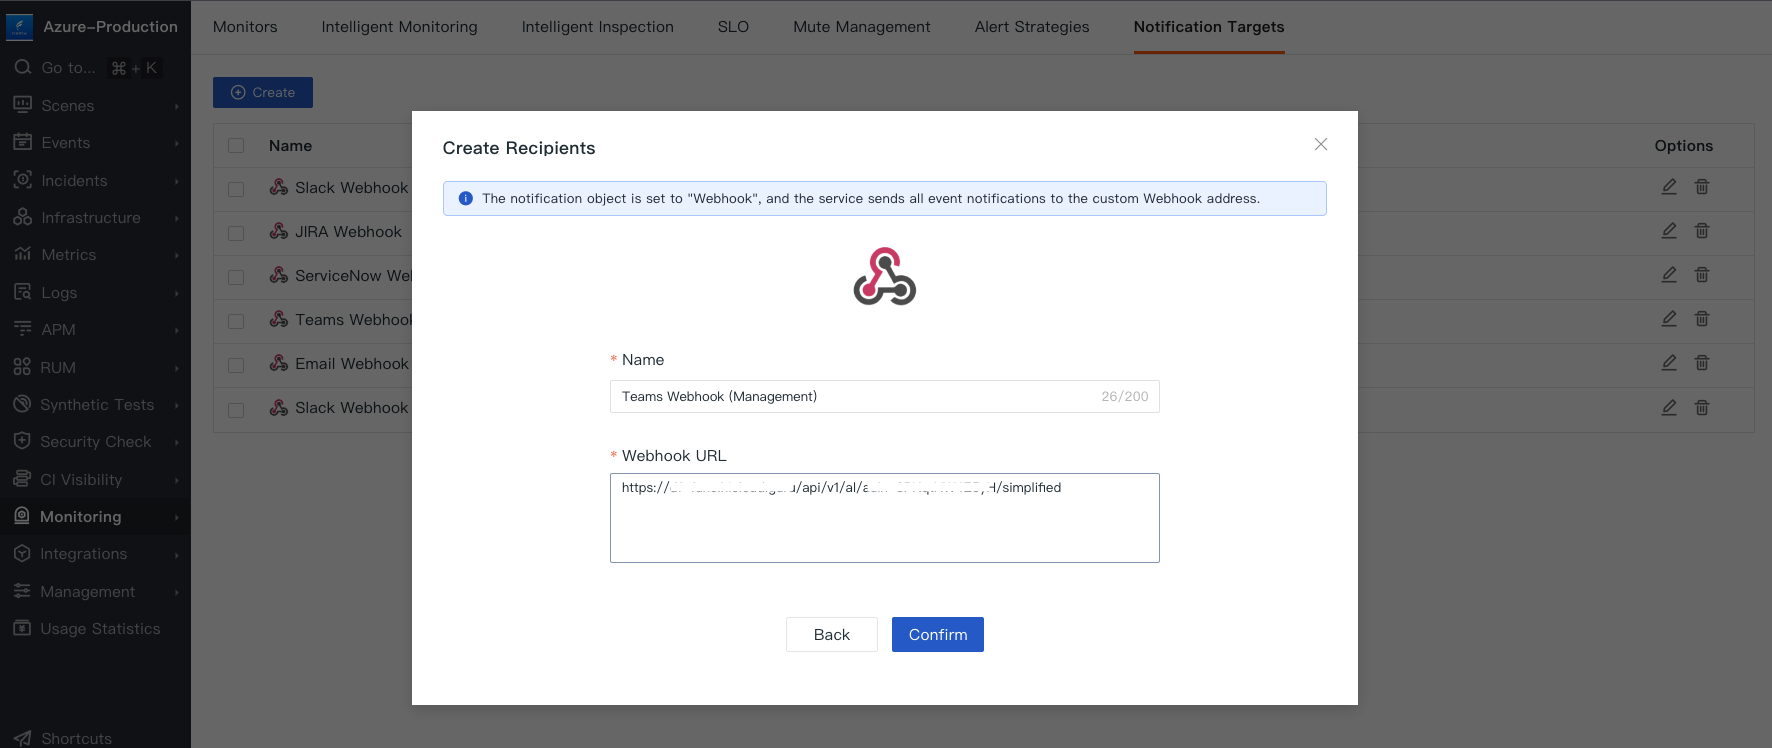
Notification targets in Multicloud Observability Platform are used to define where and how alerts should be delivered. They allow you to specify different channels for receiving alert notifications, ensuring that the right people are informed promptly. By configuring notification targets, you can integrate with various communication tools and manage alert notifications efficiently.

Steps to Create a Notification Target

  1. Access Notification Target Settings:
  • Navigate to the "Monitoring" section in the Multicloud Observability Platform dashboard.
  • Click on "Notification Targets" to view existing targets and configurations.
Notification Targets Configuration Screen
Preview
  1. Create a New Notification Target:
  • Click on the "Create" button to start creating a new notification target.
  • Choose the type of notification target (e.g., HTTP, Webhook).
  • Enter a name and description for the target.
  • Enter the required parameters (e.g., Webhook URL, Secret Key).
New Notification Target Setup
Preview

Using DataFlux Func for Custom Webhooks

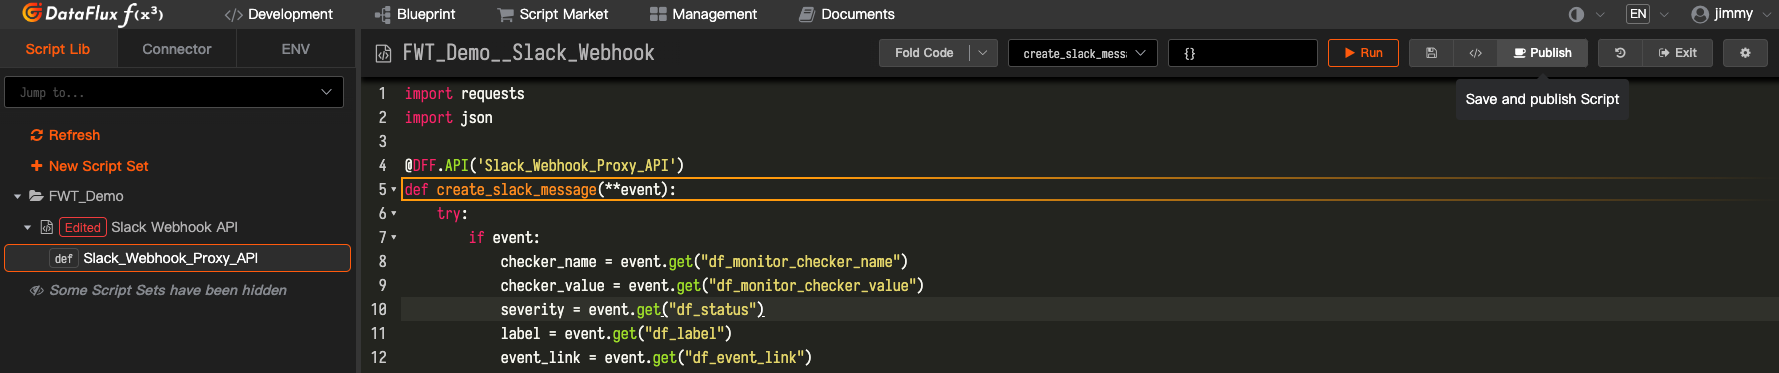
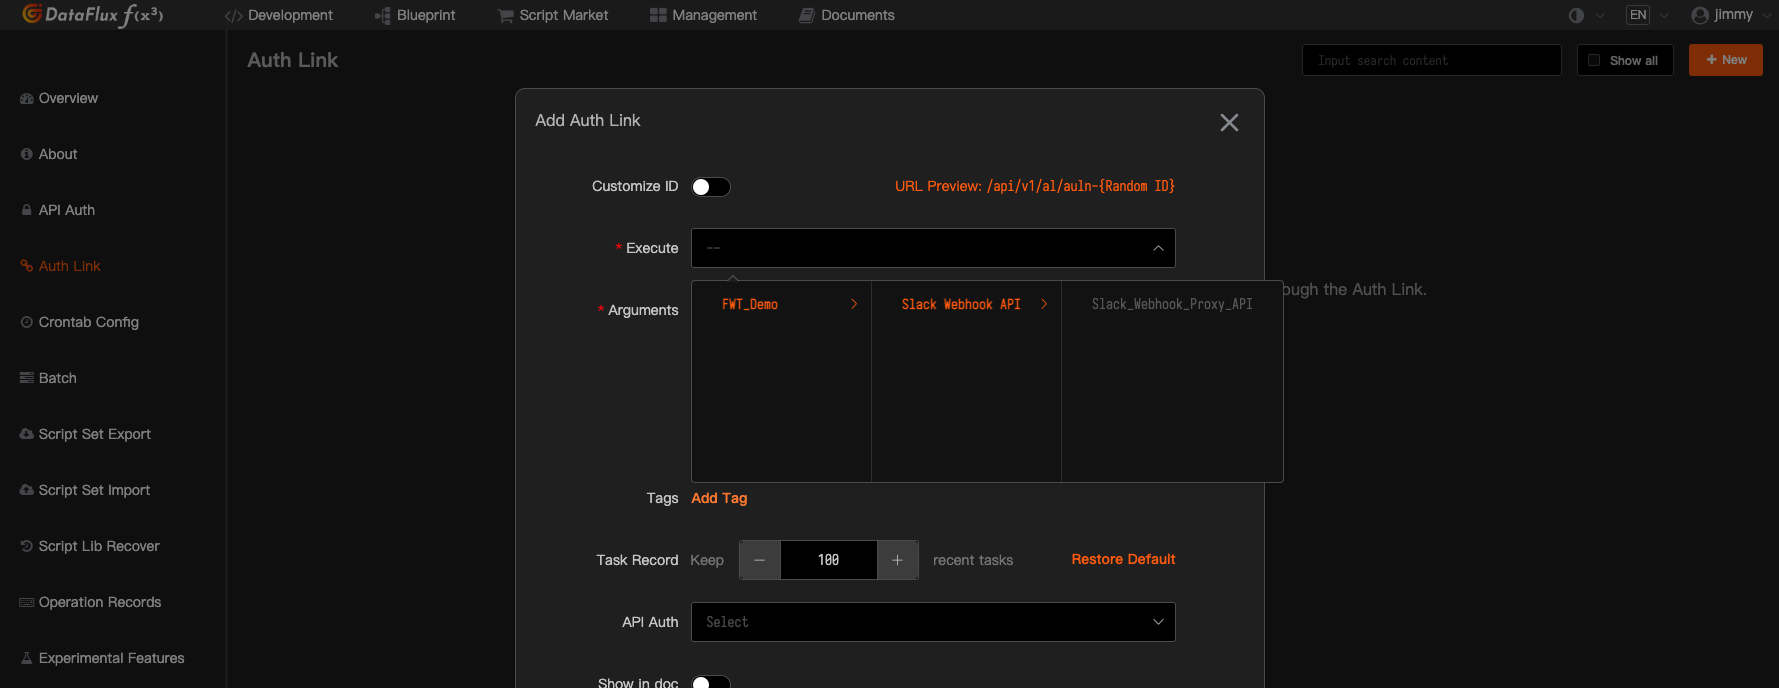
Webhooks can be developed on DataFlux Func to invoke APIs of third-party tools such as Slack or Teams, customizing alerts and sending them to specific channels.

  1. Create a DataFlux Func Script:
  • Write a script that processes alert data and sends it to the third-party API.
  • Example script for Slack:
import requests
import json

@DFF.API('Slack_Webhook_Proxy_API')
def create_slack_message(**event):
    try:
        if event:
            checker_name = event.get("df_monitor_checker_name")
            checker_value = event.get("df_monitor_checker_value")
            severity = event.get("df_status")
            label = event.get("df_label")
            event_link = event.get("df_event_link")
            workspace_name = event.get("df_workspace_name")
            service = event.get("service")
            env = event.get("env", "prod")
            ts = event.get("timestamp")
            headers = {"Content-Type": "application/json"}

            workspace_webhook_url_list = {
                "Management-Channel": "https://hooks.slack.com/services/#",
                "DevOps-Channel": "https://hooks.slack.com/services/#"
            }
            severity_icons = {
                "critical": ":fire:",
                "error": ":no_entry:",
                "warning": ":warning:",
                "ok": ":large_green_circle:"
            }
            color_list = {
                "critical": "#ff0000",
                "error": "#eb9b34",
                "warning": "#e5eb34",
                "ok": "#03fc14"
            }
            workspace_env = workspace_name + "-" + env.upper()
            icon = severity_icons.get(severity)
            payload_colors = color_list.get(severity)
            workspace_webhook_url = workspace_webhook_url_list.get(workspace_env)

            severity = severity.upper()

            payload = {
                "attachments": [{
                      "color": f"{payload_colors}",
                      "author_name": f"{icon} {severity}",
                      "title": f"{service} service ({env}) | {workspace_name} workspace",
                      "title_link": f"{event_link}",
                      "text": f"The {checker_name} monitor has triggered a {severity} alert (value: *{checker_value}*) for the {service} service ({env}) in the {workspace_name} workspace.",
                      "footer": "Time",
                      "ts": f"{ts}"
                }]
            }

            response = requests.post(workspace_webhook_url, headers=headers, data=json.dumps(payload))

        else:
            print("Invalid or missing event data.")
    except:
        print("This is err!")
        print(event)
  1. Deploy and Integrate the Script:
  • Save and publish the script on DataFlux Func
DataFlux Func Webhook Setup 1
Preview
  1. Expose the Service with an Endpoint URL:
  • Go to the "Management" tab and select "Auth Link" to create an endpoint URL to expose the service
  • Furnish relevant details such as the API Auth or rate limiting, etc. and click "Save"
DataFlux Func Webhook Setup 2
Preview
  1. Use the Webhook Endpoint:
  • Go to the "Example" section and select "Simple POST (JSON)".
  • Copy the URL to be used as the Webhook endpoint.
DataFlux Func Webhook Setup 3
Preview
@2025 All rights reserved. Produced by First Wave Technology.